- Making homemade bread requires only basic ingredients and common utensils
- The type of flour and the precision of the quantities are fundamental factors for success
- Respecting the rising times and steam baking greatly improves the final quality
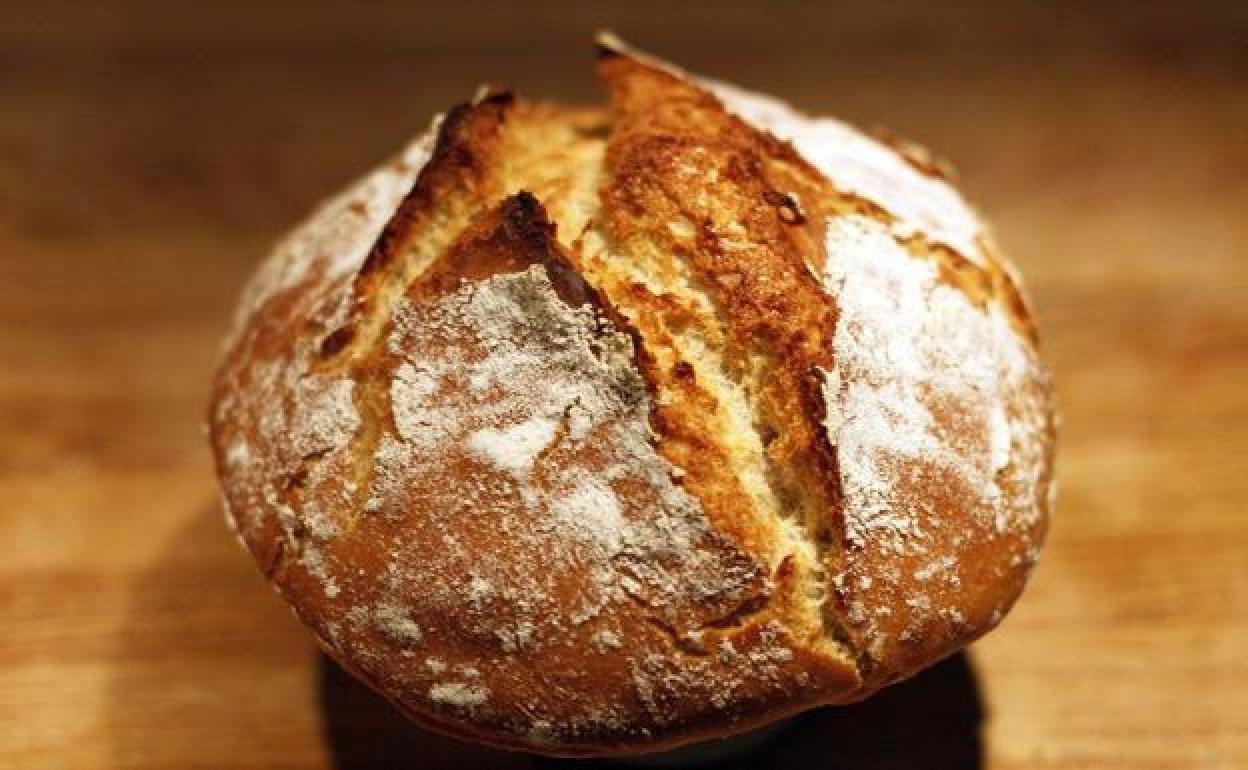
Baking bread at home has become one of the most affordable and satisfying pleasures we can enjoy in our kitchens. It's not only an entertaining and creative process, but it also allows you to achieve a handcrafted result with its own unique flavor . If you've ever wondered if you could replicate that crispy texture and characteristic aroma of bakery-fresh bread, here's the most comprehensive guide to achieving it.
In this article, you'll find all the information you need to start making homemade bread , from essential ingredients and equipment to specific tips for achieving the best results. We'll answer common questions about flours, yeasts, fermentation times, and share simple tricks that will make all the difference. Discover how, with patience and care, you can enjoy your own freshly baked bread, whether it's your first time or you already have some experience.
Why is it worth making bread at home?
Bread is not only a staple food that accompanies our daily diet, but making it at home allows you to have complete control over the ingredients and the baking process. The benefits of making artisanal bread in your kitchen include a more authentic flavor, the ability to personalize it to your liking, and the use of top-quality flours and ingredients . Furthermore, kneading and baking your own bread can be a relaxing activity, perfect for sharing with your family.
Far from requiring professional equipment, making homemade bread is an option within anyone's reach . You don't need kitchen robots or industrial machinery; your hands, a large bowl, and your regular oven are enough to achieve more than satisfactory results.
Basic ingredients and types of flour
The foundation of any bread consists of four ingredients: flour, water, yeast, and salt . From here, you can introduce some variations to enrich the flavor and texture, such as olive oil, sugar, or seeds, but these are the main components.
One of the most frequent questions is what type of flour to use . Although traditional recipes usually use strong flour, many modern and homemade recipes allow the use of all-purpose or whole wheat flour , depending on the desired result. Strong flour is distinguished by its higher protein content (between 9% and 11%) , which facilitates gluten development and helps achieve the balance between elasticity and body that characterizes quality bread.
Equally important is the yeast , which can be fresh or dried baker's yeast. Fresh yeast is usually found in supermarkets and bakeries, while dried yeast offers convenience due to its longer shelf life. If you need to adjust quantities, 5 to 7 grams of fresh yeast, or the equivalent in dried yeast, are typically used for 500 grams of flour.
The salt ratio provides just the right touch to enhance the flavor and balance the fermentation. Don't forget to measure the ingredients carefully : eyeballing it can ruin your work. Always use a scale to weigh the flour, water, and salt.
Essential utensils for making bread at home
To make the process as comfortable and successful as possible, prepare the necessary utensils:
- big bowl for mixing and kneading
- Clean kitchen towel to cover the dough during resting periods
- Spatula or scraper for handling the dough (optional, but very useful)
- Baking tray or deep baking dish (like a Pyrex bowl or casserole dish)
- Vegetal paper to prevent the dough from sticking
- Sharp knife to make the cuts in the dough before baking
- Rack to cool the bread after baking
If you have a stand mixer or food processor, you can use it to knead , although doing it by hand has its charm and allows for better control of the texture.
The manufacturing process: step by step from scratch
The secret to good homemade bread lies in both the quality of the ingredients and respecting each stage of the process. There are some variations depending on the type of bread you want to make—from crusty loaves to rustic rolls or wholemeal bread—but generally speaking, these are the fundamental steps:
1. Weigh and prepare all ingredients : Before starting, make sure you have everything on hand and weighed. This speeds up the process and prevents mistakes due to forgetting a step or ingredient.
2. Mix the dry ingredients : In a large bowl, place the flour and salt. If the recipe includes sugar, add it here as well.
3. Add the water : Gradually add the lukewarm water (between 20°C and 24°C is ideal; check by dipping a finger in: it shouldn't feel cold or hot), mixing initially with a spoon and then with your hands. If using fresh yeast, it's best to add it a few minutes before the end of kneading to better activate it. If using dried yeast, you can dissolve it beforehand in a little warm water.
4. Incorporate the oil (if the recipe includes it): Add one or more teaspoons of olive oil to give smoothness and aroma.
5. Kneading the dough : The art of kneading is fundamental. Mix all the ingredients and knead for at least 10 minutes, until the dough is manageable, smooth, and no longer sticky. You can alternate short periods of kneading and resting to facilitate the process and make the dough more elastic.
6. First rise and fermentation : Shape the dough into a ball, place it in the bowl, and cover with a damp cloth. Let it rest in a warm place for at least 30 minutes, or until the dough has doubled in size. In simple recipes without sourdough starter, this first rise can last an hour, although some quick versions don't require that much time.
7. Divide and shape the pieces : If you want individual loaves or rolls, divide the dough into equal portions (about 120 grams is ideal for loaves). Flour your work surface and shape each piece, flattening and rolling it until you achieve the desired shape.
8. Second rising : Once the loaves are shaped, let them rest again on the floured tray, covered with a damp cloth, for about 15 to 90 minutes depending on the recipe. This step is vital for the bread to rise and develop a light texture.
Perfect baking: tips and tricks

Most home ovens allow you to bake bread with good results, but there are some details that should be taken care of to achieve a golden and crispy crust:
- Preheat the oven to 200-230ºC depending on the chosen recipe. A hot oven helps the bread rise quickly and develop a good crust.
- Create steam in the ovenA very effective home trick is to place a tray on the bottom rack of the oven while it's heating up. Just as you put the bread in, pour a glass of water onto the tray to create steam, which helps achieve a beautiful crust.
- Make cuts in the surface of the pieces Before baking, score the bread with a sharp knife. The cuts not only give it a professional look, but also allow the bread to expand properly during baking.
- Place the pieces separately. to prevent them from sticking.
- Bake the bread for 15 to 45 minutes Depending on the size of the pieces (loaves, rounds, rolls) and the type of bread, the bread should acquire a golden color and sound hollow when tapped on the bottom.
- Let cool on a wire rack before cutting or consuming to prevent caking.
Some recipes, especially those for no-yeast loaves, allow you to prepare and bake the bread in just over an hour. If you're looking for more complex breads (such as whole wheat or sourdough), you'll need longer fermentation times to develop flavor and improve digestibility.
Variations: Use alternative flours and techniques
Versatility is one of the biggest advantages of making bread at home. You can use regular wheat flour, bread flour, whole wheat flour, spelt flour, rye flour, and even mix different flours to experiment with textures and aromas. Keep in mind that whole wheat and alternative grain flours tend to absorb more water and require slower fermentation, but they offer superior flavor and nutritional value.
In addition, you can add seeds, nuts, spices or replace some of the water with milk to make softer breads, perfect for breakfasts or snacks.
Tips and tricks for making spectacular bread
- Always weigh the ingredients accurately.Don't improvise or use "cups" or "spoons", always use grams and milliliters.
- Respect the resting and rising timesFermentation is key to achieving a bread with a good crumb and flavor.
- Choose a warm place to let the dough restIf your kitchen is cold, you can turn the oven on to the lowest temperature, turn it off, and leave the dough inside with the door ajar.
- Make clean, deep cuts before baking for a professional presentation and even baking.
- Experiment with flours and proportionsHomemade bread allows for adaptations, but always start with the basic recipes until you master the techniques.
- Use a little oil in the dough before baking if you're looking for a smoother, shinier crust.
Remember that every oven is different , so the exact time may vary. Keep an eye on the bread in the last few minutes and do the sound test: tap the bottom lightly, and if it sounds hollow, it's ready.
Common mistakes and how to avoid them
Even the simplest recipes can encounter problems. The most common concerns are usually related to the dough's texture, the volume after baking, or the final flavor. If the dough is too sticky, gradually add flour . If it's dry, incorporate small amounts of water until it's manageable.
Don't skip the resting periods . Patience is your best ally in home baking, and the result more than makes up for the wait.
The bread isn't rising: make sure the yeast is active (check the expiration date and dissolve it in warm water if you're unsure). Avoid excess salt, as it can inhibit the yeast's activity.
The crust is soft : try baking with steam and let the bread rest on a wire rack after baking so that moisture doesn't accumulate at the base.
Ideas for enjoying your homemade bread
Freshly baked bread is delicious on its own , but it's also perfect to accompany all kinds of meals. You can enjoy it toasted with butter and jam, with tomato and olive oil, as a base for toasts with cheese, cold cuts, or vegetables, or even as the star of a quick dinner.
In addition, homemade bread can be frozen once sliced, allowing you to enjoy freshly baked bread at any time.
If you're feeling adventurous, you can use seeds. As you master the basic recipe, you can experiment and turn your kitchen into your own bread bakery.
