- Fossils in Pokémon Pokopia are obtained by breaking shiny blocks with the help of the Dowsing Machine and tracker Pokémon.
- There are 22 key fossils that allow you to mount skeletons in displays to attract fossil Pokémon and complete the Pokédex.
- Each fossil set (Skull, Armor, Jaw, Fin, Headbutt, Shield, Tundra, Despot, Wing) requires combining several pieces and supports.
- Fossils, relics, CDs, and mysterious pieces are essential to achieve 100% completion of the game and unlock various systems.
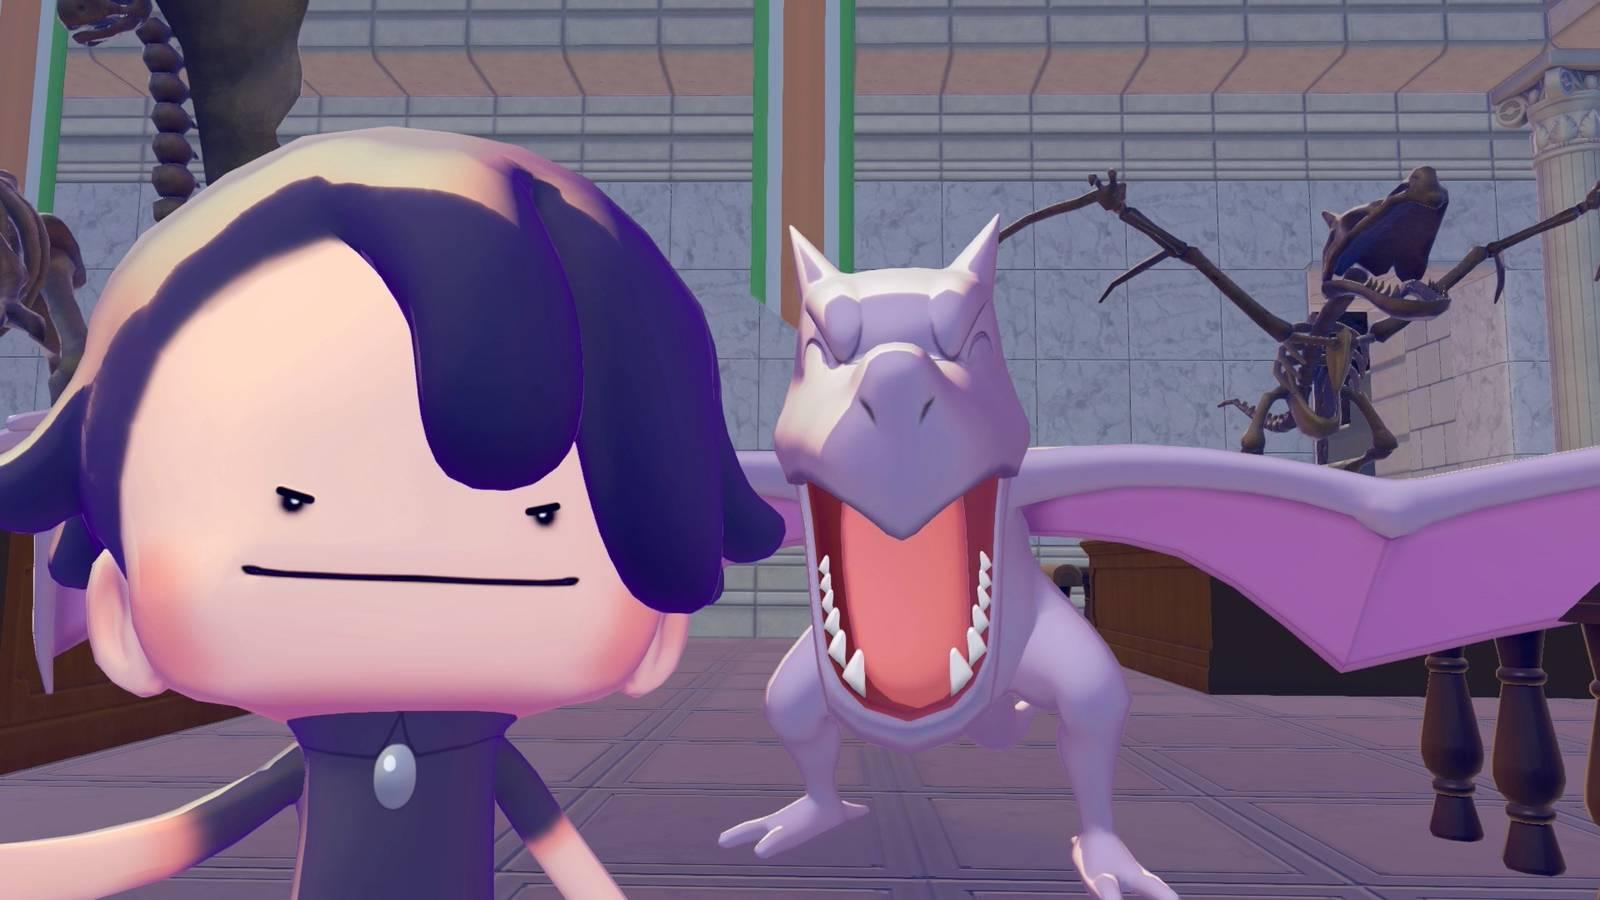
The world of Pokémon Pokopia is a paradise for the curious and those who seek secrets, with countless details hidden underground, in the walls, and in the most unexpected corners. Among them all, fossils stand out as one of the most important objects , both for decoration and for attracting prehistoric Pokémon that don't appear any other way.
If you want to complete the Pokédex and the game 100%, you'll have to roll up your sleeves and dig tirelessly. Fossils in Pokémon Pokopia aren't just for decoration; they're key to creating habitats and reconstructing skeletons that will bring Pokémon like Cranidos, Shieldon, Tyrunt, Amaura, their evolutions, and even Aerodactyl to life. In this guide, you'll find everything you need to know: how to obtain fossils, how to use them, which combinations each Pokémon needs, and their relationship to relics, CDs, and other collectibles.
How to get fossils in Pokémon Pokopia
In Pokopia, fossils aren't tied to fixed locations on the map . There's no specific cave or biome where you can be guaranteed to find them: it depends on chance and how much time you're willing to spend digging and breaking special blocks.
During the game, you'll see blocks of earth or rock that emit a striking golden glow. These glowing spots on the ground and walls are your main source of fossils , as well as other items like relics, CDs, and mysterious pieces. To extract the contents, you'll have to break them using moves like Rock Smash or by interacting with them when the game allows it.
In some cases, these glowing blocks warn that they are about to explode . When you see this warning, you must react quickly and use a water move, such as Water Gun, to neutralize the explosion and claim the loot. If you mistime or ignore the warning, you will lose the opportunity to collect the item inside.
While you can find them through normal exploration, the most efficient method for locating fossils, relics, CDs, and mysterious pieces is the Dowsing Machine . This item, equivalent to the classic Dowsing Machine, is obtained very early in the adventure or can be purchased at the Pokémon Center for a few PokéCoins.
Once you have the Dowsing Machine, you must attract a Pokémon with the tracking ability to your base , such as the Drilbur you obtain by creating a garden during the tutorial where you can find wheat in Pokémon Pokopia . By talking to this Pokémon and using the Dowsing Machine, it will guide you to specially glowing blocks of earth and rock, hidden in the ground, walls, or cliffs.
In addition, there are a few tricks that can help you maximize your finds. For example, exploring areas like Bleak Beach or other open spaces at night makes it easier to spot the golden glow of the boulders against the surrounding terrain. In broad daylight, the glow is somewhat camouflaged by the yellow grass or sand, so nighttime excursions can be worthwhile.
Another detail to keep in mind is the influence of certain Pokémon. If you feed Mosslax sweet foods, such as Pecha Berries , you increase the chances of finding artifacts in general, including fossils, within the same group of random items that drop from glowing blocks.
How many fossils are there, and what other objects can be found by digging?
By digging and breaking glowing blocks, you'll obtain not only fossils, but also relics, music CDs, and mysterious pieces . It's all part of the same pool of possible objects, so patience is key if you want to collect absolutely everything.
Within the category of fossils themselves, there are 22 fossils in the game considered Lost Relics . This is the set you need if your goal is to complete both the Pokédex and the collection of ancient artifacts. Unlike other items, these fossils aren't divided into huge collections: they're a limited and manageable number… provided you have some luck with the RNG.
The other three types of objects that come from the same blocks are just as important for 100% completion:
- Relics: Fragments of human civilization, when taken to Tangrowth, are identified and transformed into furniture and decorative objects for your base. They can also be traded with Gimmighoul at the Rocky Ridge Museum in exchange for special furniture pieces from his collection.
- Music CDs: Discs containing tracks from multiple Pokémon games. You give them to the Rotom in Rocky Cliffs, which will act as a player and play the tracks you've given it when you approach.
- Mysterious Pieces: These blocks are linked to one of the major side puzzles in Pokémon Pokopia, considered one of the game's greatest secrets. They are obtained in exactly the same way as fossils, by using the Dowsing Machine and breaking glowing blocks.
While fossils might seem like just "another item" in this group, they're actually the key to unlocking Pokémon that would otherwise never appear . That's why they're essential if you enjoy collecting everything and seeing your Pokédex shine at 100%.
How fossils work: decoration, habitats and Pokédex
When you start collecting fossils, you might see them simply as curious objects or decorations for your base. However, their main function is to serve as the foundation for building skeletal habitats , which in turn allow certain fossil Pokémon to appear on your island.
Each set of fossils belongs to a specific Pokémon, and they almost always share a similar name that identifies them as part of the same body . By collecting all the pieces of a set, you can assemble a complete skeleton in one or more display stands (display pedestals), and this reconstruction will act as a habitat where the Pokémon in question will appear.
Display cases are a type of special furniture on which fossils or other objects are placed. In some cases, a single display case will suffice, but for larger creatures, you'll need to combine two, four, or even more display cases to create a unique stand large enough to hold the entire skeleton.
The idea is simple yet powerful: once the skeleton is mounted on the appropriate display stand, leave it in place and wait . After a few hours (in-game time and, often, in real time), the corresponding fossil Pokémon will appear "materialized" in that habitat, ready for you to befriend it and add it to your team or Pokédex.
An important detail is that you don't have to place the fossils in a specific location on the map. The old Rocky Crags museum is a very convenient place to house these skeletons , as it has plenty of space and a suitable theme. But you can also display them at your base or other locations as long as you can fit the necessary display cases together.
Regarding whether fossils work the same indoors and outdoors, community experience indicates that the conditions for a fossil Pokémon to appear may depend on factors such as time, progress, or the number of real-world days , rather than whether it's inside or outside. If you've had a fossil on display for several days and its Pokémon hasn't appeared, it's often just a matter of being a little more patient, progressing further in the story, or checking that the fossil is completely filled.
Early fossil stages: Cranidos, Shieldon, Tyrunt and Amaura
The first fossil creatures you'll typically try to obtain are the base forms: Cranidos, Shieldon, Tyrunt, and Amaura . For these Pokémon, the process is straightforward, as they only require a main fossil and a single display case.
Cranidos is obtained from the Skull Fossil. In practice, you only need to place one fossil in the corresponding display case: just one display case with the Skull Fossil is enough for Cranidos to appear . After the required time has passed, the live version of this Pokémon will appear near the skeleton, and you can add it to your Pokédex.
In the case of Shieldon , its basic fossil is the Armor Fossil. Again, a single display case with the Armor Fossil is enough to attract Shieldon . No additional parts need to be combined at this early stage, so preparing a habitat for it is relatively easy if you've already had some luck digging.
For Tyrunt , the key fossil is the Jaw Fossil. It works the same way as the previous ones: place the Jaw Fossil in an individual display case , leave it there, and after a while, Tyrunt will appear in the area around that skeleton. If you're a fan of Rock/Dragon-type Pokémon, this will be one of the first ones you'll want to prioritize.
Finally, for Amaura , the item you're looking for is the Sail Fossil. Following the same logic, simply placing the Sail Fossil in a display case creates the necessary habitat for Amaura to appear . It's a fairly easy way to start building your fossil Pokémon collection, since you only need one piece per creature.
All of these first-stage fossils also have their own version of a display or themed stand (for example, Skull Fossil display, Armor Fossil display, Jaw Fossil display, Sail Fossil display), but the essential requirement for making the Pokémon appear is having the base fossil placed in a functional display stand . The decorative stand provides aesthetics and visual consistency, but the core mechanic is based on the fossil itself.
Evolutions and fossils divided into sections
When you move from base forms to evolutions, things get complicated. The remains of evolved fossil Pokémon are divided into several sections because their bodies are much larger and take up more space in the display cases.
Depending on the creature, the skeleton may be fragmented into three, four, or even five distinct pieces . Each part has a specific name (head, torso, legs, tail, wings, etc.), and all of them must be placed on display stands that combine to form a single, larger stand.
In addition to the body parts, each set usually includes a special display stand that serves as the main base . The remaining fragments are connected to this base to visually complete the skeleton and, most importantly, to make it suitable as a habitat for the game.
Once you have all the parts and place them correctly, the process of the Pokémon appearing works the same as with the first stages : you leave the skeleton assembled, go on to continue playing, and when you return later, the evolved fossil Pokémon should be waiting in that same place to join your collection.
Let's now look, one by one, at the specific cases of Rampardos, Bastiodon, Aurorus, Tyrantrum, and Aerodactyl, along with the parts you need in each case according to the game and community data.
Rampardos: combination of the Headbutt Fossil
Rampardos is the evolved form of Cranidos and, as such, requires a much larger and more detailed skeleton . Its fossils are grouped under the name Headbutt Fossil and are divided into several sections.
To attract Rampardos, you need to gather the following items from the Cabezazo family :
- Headbutt Fossil display.
- Headbutt Fossil (head) – head section.
- Headbutt Fossil (body) – section of the trunk or body.
- Headbutt Fossil (tail) – tail section.
Some descriptions detail the recommended order: first place the Headbutt Fossil (trunk/body) on a display stand , and then connect the Headbutt Fossil (head) and the Headbutt Fossil (tail) to complete the structure. In practice, the goal is for the entire skeleton to sit on the display stand.
Once all the pieces are in place, the Rampardos skeleton will be assembled as a large decorative figure. After leaving it on display for a while, the game will cause Rampardos to appear in that fossil habitat , at which point you can interact with it and add it to your Pokédex, thus completing the evolutionary cycle of Cranidos.
Bastiodon: Assembling the Shield Fossil
Bastiodon, an evolution of Shieldon, is another of the great fossil giants that require several pieces to reconstruct its habitat. Its collection of objects is called Shield Fossil and also includes a specific display.
The components needed for Bastiodon are:
- Shield Fossil display – main display of the Shield set.
- Shield Fossil (head) – part of the head.
- Shield Fossil (body) – part of the body or trunk.
- Shield Fossil (tail) – tail section.
Some guides indicate that the Fossil Shield (trunk) should be placed in a group of four display stands that combine to form a single, larger stand, and then the head and tail are connected to complete the fossil. The important thing is that all the pieces are integrated into a unified stand so that the game recognizes the habitat as valid.
Once the structure is complete, Bastiodon will take some time to appear alongside its reconstructed skeleton . If several days pass and it hasn't appeared, check that the display is complete, that no sections are missing, and that the display stands are correctly arranged. Patience is part of the process with larger fossils.
Aurorus: The Tundra Fossil and its sections
Aurorus is the evolved form of Amaura and one of the most elegant fossils in Pokopia. Its set is called the Tundra Fossil , and both its base fossil and display version appear in the fossil table.
According to the game's listings, the elements related to Aurorus are:
- Sail Fossil – basic fossil associated with Amaura.
- Tundra Fossil display – main display of the Tundra set.
- Tundra Fossil (head) – head section.
- Tundra Fossil (body) – main body section.
- Tundra Fossil (legs) – fragment corresponding to the legs.
In some descriptions the body is referred to as "body" and other times as "body + tail", but the idea is the same: first you place the body part (or main body) on two display stands that combine to create a long stand , and then you add the head and tail or legs as indicated in the inventory.
Once you've finished assembling the Tundra Fossil, you'll have a large skeletal figure that fits perfectly in the Rocky Cliffs Museum or on a large display stand. After leaving it in place long enough, Aurorus will appear in that area . In addition to adding it to your Pokédex, its fossilized habitat makes a spectacular decorative piece.
Tyrantrum: all parts of the Despot Fossil
Tyrantrum, the evolution of Tyrunt, is one of the most complex fossils to reconstruct because its body is divided into many sections and requires a good number of combined displays.
The set is called the Despot Fossil, and to complete it you will need to find:
- Despot Fossil display – main display of the Despot family.
- Despot Fossil (head) – part of the head.
- Despot Fossil (body) – section of the trunk or body.
- Despot Fossil (legs) – part of the legs.
- Despot Fossil (tail) – tail section.
The recommended arrangement is to first place the Despot Fossil (legs) in a group of four display stands that merge into a single large support. Once this base is assembled, add the Despot Fossil (body), followed by the head and tail, until the skeleton is complete.
When everything fits together and the game correctly detects the structure, Tyrantrum will appear in the area of that fossil habitat . Since it's one of the most impressive and powerful fossil Pokémon, reconstructing it is often a major goal for players who are serious about exploration and farming shiny blocks.
Aerodactyl: The Mystery of the Wing Fossil
Aerodactyl is a classic among fossil Pokémon, and in Pokopia, its set is linked to the Wing Fossil . Things get a bit more complicated here, as the guides are still refining the exact details of the ideal arrangement.
The following items related to the Ala Fossil are listed in the fossil inventory:
- Wing Fossil (right wing) – right wing.
- Wing Fossil (left wing) – left wing.
- Wing Fossil (body) – part of the body.
- Wing Fossil (tail) – tail section.
The final structure requires several display stands that combine into one large stand, similar to museum displays of large flying reptiles. Official sources and many guides indicate that the optimal steps and exact order of placement are still being refined , but the principle remains the same: gather all the sections of the Wing Fossil and assemble them so that the system recognizes the complete skeleton.
Although some explanations lack nuance, the end result is clear: when you have all the parts of the Wing Fossil and place them correctly in linked displays, Aerodactyl will eventually appear in that habitat . It is one of the most coveted fossils and is usually also one of the last to be completed due to the rarity of some pieces.
Use the dowser and tracking specialties efficiently
If your goal is to collect all the fossils, relics, CDs, and mysterious pieces, it's not enough to just dig occasionally: you should integrate the use of the Dowsing Machine and the tracking Pokémon into your gameplay routine.
Once you obtain the Dowsing Machine (or purchase it for 50 PokéCoins at the Pokémon Center), be sure to bring a Pokémon with the Tracking ability, such as Drilbur, to your base . Talk to it frequently and let it guide you to dirt blocks that emit a special glow, even in areas you thought you had already searched.
It's also advisable to break any naturally occurring shiny blocks immediately, rather than waiting . The loot is completely random, so every chance counts: you never know if you might find the exact fossil piece you need to complete a complex skeleton like Tyrantrum's or Aerodactyl's.
If you notice you haven't found any specific fossils in a while, you can supplement your search with an additional tactic: take photos of your friends' fossils and use a 3D printer to create copies . Each printed fossil costs 2 Rare Pokémetals, which is a high price, but it can get you out of a bind if you're only missing one piece to complete a Pokémon's habitat.
However, there's an important caveat: fossils obtained through 3D printing aren't registered in the "ancient artifacts" section of your Collection . Only pieces you've excavated yourself count as artifacts. From a completionist's perspective, you'll eventually want to acquire all the pieces the traditional way, but the 3D printer is a very useful temporary solution if you prioritize gameplay over pure collecting.
Relationship of fossils to 100% of the game and other systems
Fossils don't exist in a vacuum; they're part of a trio of key collectibles alongside relics and CDs . All three are obtained in the same way, but they're used in very different in-game systems.
Relics become furniture after being crafted by Tangrowth, or they can be traded with Gimmighoul at the Rocky Ridge Museum for exclusive decorative items. Music CDs power the Rotom, which acts as a player and allows you to customize the ambient soundtrack of your favorite areas.
Fossils, on the other hand, are essential for unlocking fossil Pokémon habitats, completing the Pokédex, and decorating with spectacular skeletons . Collecting all the fossils, relics, and CDs is directly linked to the goal of 100% completing Pokémon Pokopia, so you shouldn't neglect any of these three elements as you progress through the story.
Furthermore, the same Dowsing Machine mechanic also allows you to locate the mysterious pieces that make up one of the game's biggest puzzles . Since everything comes from the same type of glowing blocks, any farming trip can help you progress toward several goals at once: fossils, relics, CDs, mysterious pieces, and even other useful items.
In the end, if you explore carefully, take advantage of the help of tracker Pokémon, frequently visit areas like Rocky Crags, Bleak Beach, and other large areas, and don't miss a single shiny block, you'll gradually complete all the fossil sets and activate habitats for Cranidos, Shieldon, Tyrunt, Amaura, Rampardos, Bastiodon, Aurorus, Tyrantrum, and Aerodactyl . With that, your Pokédex, your museum, and your base will be overflowing with life… and bones, lots of bones.
